ARMxy embedded hardware, integrated with ThingsBoard IoT Gateway, enables SNMP v3.0 data collection and reliable forwarding to MQTT, providing an efficient and stable protocol adaptation solution for industrial IoT projects.
Case Details
1. Overview
The core function of the ThingsBoard IoT Gateway SNMP connector is to collect data from SNMP devices and upload it to the ThingsBoard platform. It should be noted that the SNMP connector itself does not directly support SNMP v3 to MQTT protocol conversion. However, this can be achieved indirectly via ThingsBoard’s ecosystem mechanism of “SNMP data collection + internal forwarding.”
If SNMP v3 security features are required, authentication and encryption parameters must be correctly configured.
This practical test is conducted on the BL410 hardware platform, which features an ARM architecture, providing stable performance and strong compatibility. Test results show that BL410 fully supports SNMP v3.0 to MQTT forwarding, and all ARMxy series hardware from BEILAI can be adapted to similar projects, offering flexible hardware options.
2. Prerequisites
- Basic environment: Python 3.8 or above installed, and ThingsBoard Gateway successfully deployed on BL410;
- Test device: SNMP v3 local simulation agent (snmpd) set up on BL410 to replace real SNMP devices;
- MQTT client: MQTTX or mosquitto_sub installed for verifying MQTT data forwarding;
- SNMP test tool: To verify network reachability of SNMP v3 devices;
- ThingsBoard service: Running properly as the MQTT message receiver.
3. Guide
Step 1: Set up SNMP v3 simulation agent (snmpd)
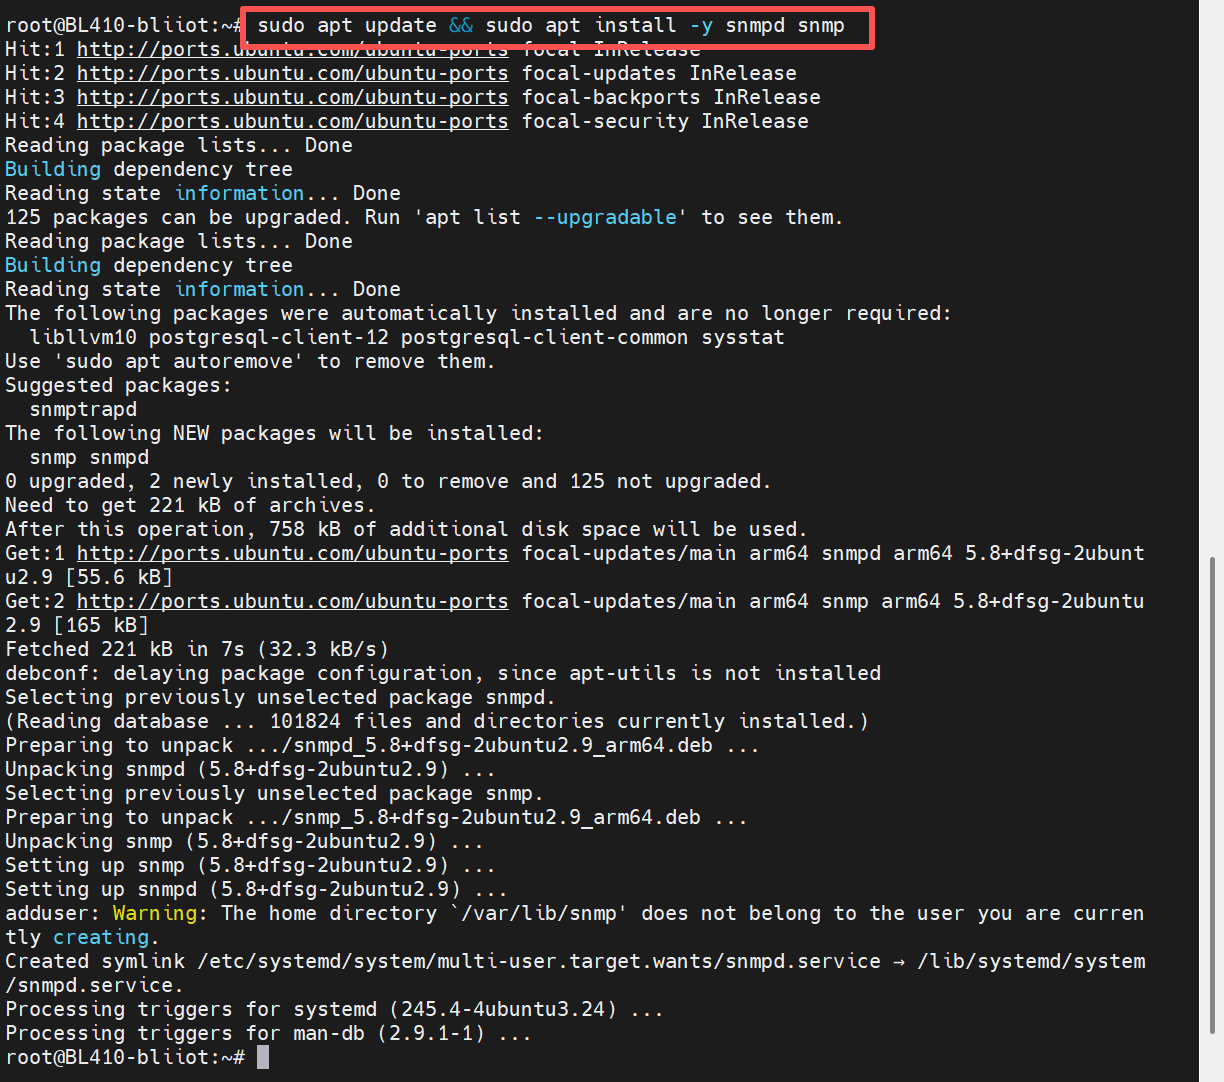
1. Install the snmpd tool and related dependencies using the following command:
sudo apt update && sudo apt install -y snmpd snmp
2. Configure SNMP v3 User (Key step: Create an SNMP v3 user with authentication and encryption)
Execute the following command to create an SNMP v3 user, specifying SHA as the authentication protocol, AES as the encryption protocol, and setting the corresponding keys:
sudo net-snmp-config --create-snmpv3-user -a SHA -A "AuthPass123!" -x AES -X "PrivPass123!" snmpv3user

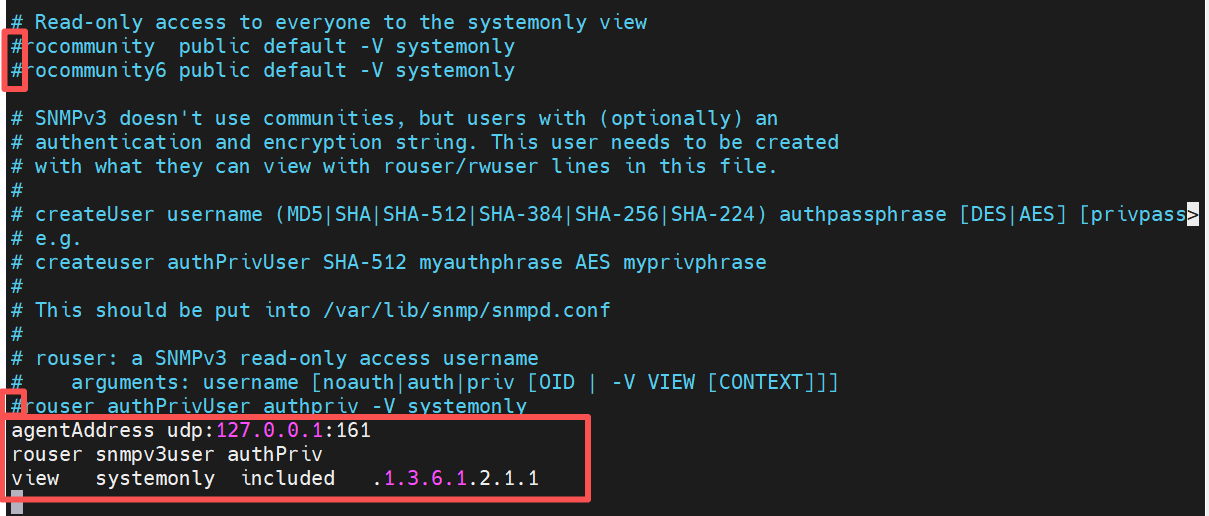
3. Modify the snmpd configuration file
Edit sudo nano /etc/snmp/snmpd.conf, comment out the existing default configurations, and add the following content:

4. Restart snmpd and enable it to start on boot
sudo systemctl restart snmpd
sudo systemctl enable snmpd

5. Verify SNMP v3 access
Execute the following command to check whether the SNMP v3 agent is working properly. If the system description information is returned, the configuration is successful:
snmpget -v3 -l authPriv -u snmpv3user -a SHA -A "AuthPass123!" -x AES -X "PrivPass123!" 127.0.0.1 1.3.6.1.2.1.1.1.0
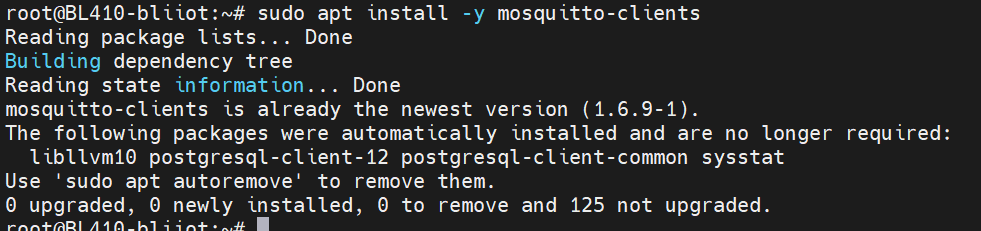
 Step 2: Install MQTT Client (for Forwarding Verification)
Execute: sudo apt install -y mosquitto-clients
Step 3: Configure ThingsBoard Gateway (Implement SNMP v3 → MQTT Forwarding)
1. Modify the Gateway main configuration (tb_gateway.json)
Open config/tb_gateway.json and ensure that the SNMP connector is enabled:
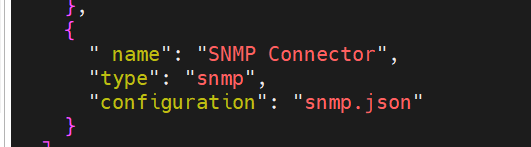
2. Configure the snmp.json file. Edit the config/snmp.json file and configure the SNMP v3 connection parameters, data collection rules, etc., according to the following format:
{
"timeout": 5,
"retries": 3,
"devices": [
{
"deviceName": "SNMPv3_Router",
"deviceType": "snmp",
"ip": "192.168.1.XXX", // SNMP device IP
"port": 161,
"pollPeriod": 5000,
"version": "3", //Specify SNMP version as v3
"community": "public",
"security": { // SNMPv3 authentication and encryption configuration
"username": "snmp_user_XXX",
"securityLevel": "authPriv",
"authProtocol": "SHA",
"authKey": "Auth_Key_XXX@123", // Authentication key
"privProtocol": "AES",
"privKey": "Priv_Key_XXX@123" // Encryption Key
},
"attributes": [
{
"key": "Equipment Model Description",
"method": "get",
"oid": "1.3.6.1.2.1.1.1.0",
"timeout": 6
}
],
"telemetry": [ // Acquisition equipment telemetry data
{
"key": "Equipment system information",
"method": "table",
"oid": "1.3.6.1.2.1.1"
}
]
}
],
"logLevel": "INFO",
"name": "SNMP",
"enableRemoteLogging": false,
"id": "XXX-XXX-XXX-XXX-XXX", // Connector Unique ID
"configVersion": "3.8.1"
}
3. Verify the SNMP connection validity. Execute the SNMP v3 access command again to confirm that the connection between the Gateway and the SNMP emulator is normal: `snmpget -v3 -l authPriv -u snmpv3user -a SHA -A "AuthPass123!" -x AES -X "PrivPass123!" 127.0.0.1 1.3.6.1.2.1.1.1.0`

Step 4: Test Basic MQTT Functionality
1. Subscribe to a Test Topic
mosquitto_sub -h 127.0.0.1 -p 1883 -t "test/#" -v

2. Publish a test topic: `mosquitto_pub -h 127.0.0.1 -p 1883 -t "test/hello" -m "world"`

Step 5: Subscribe to MQTT Topic (Verify Forwarding)
Open a new terminal and execute the following command to subscribe to the MQTT topic where ThingsBoard Gateway forwards SNMP data:
mosquitto_sub -h 127.0.0.1 -p 1883 -t "v1/gateway/telemetry" -v

4. ThingsBoard Cloud Platform Connection Instructions
The ThingsBoard cloud platform connection and SNMP device connection are two independent modules. Configuration on the BL410 platform is as follows:
1. SNMP Connector → Router Device (SNMP v3 Communication)
Connection address: Use the router’s local network IP
Communication port: 161
Protocol version: SNMPv3
2. SNMP Connector → ThingsBoard Cloud Platform (MQTT Communication)
Connection address: thingsboard.cloud (ThingsBoard cloud platform domain)
Communication port: 1883 (default MQTT port)
Purpose: Upload SNMP data collected by the BL410 device to the cloud platform
5. Verification Results
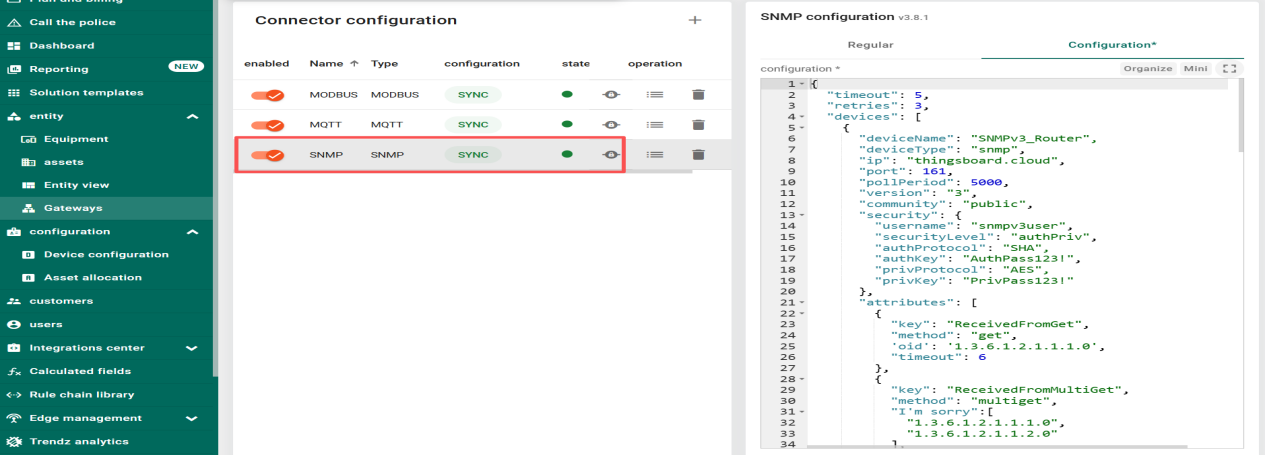
On the ThingsBoard platform, the SNMP connector shows a “SYNC” status, indicating that the BL410 device has successfully connected to the ThingsBoard platform. The configuration version is v3.8.1, and the SNMP v3 authentication and encryption features are active.

SNMPv3_Router Device:
Successfully collected the “Device Model Description” (OID: 1.3.6.1.2.1.1.1.0), with the data value being the device system description string:
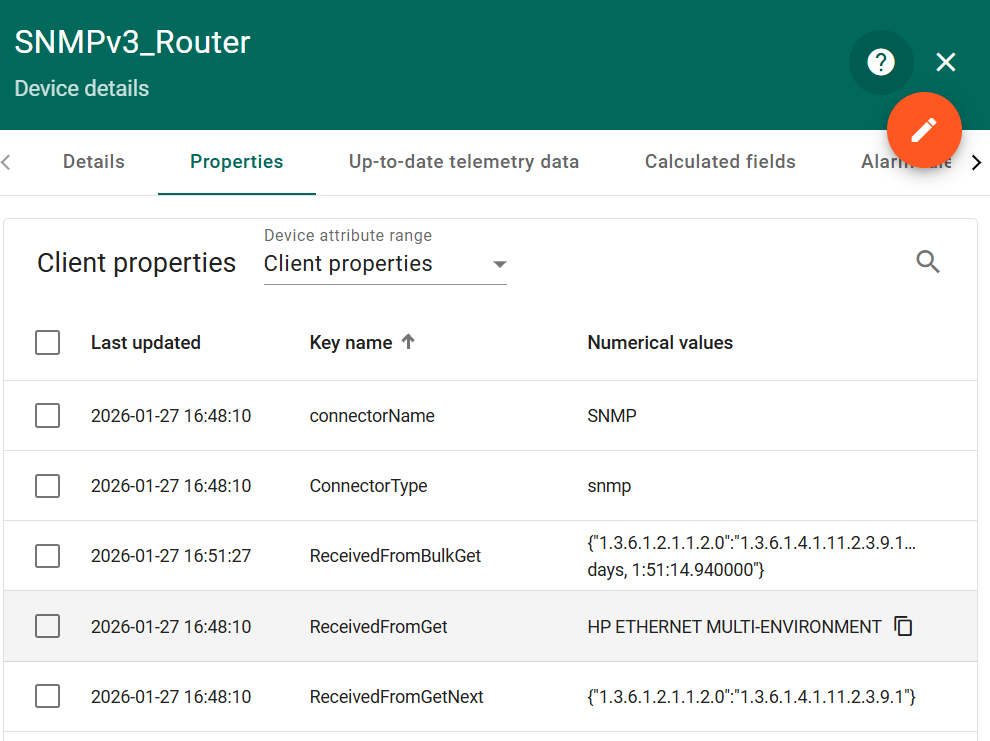
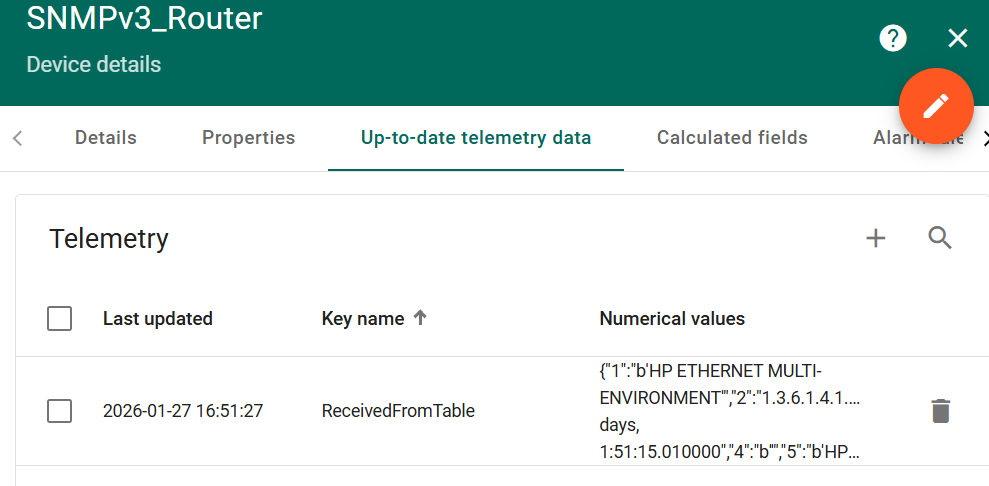
Collected the device system information in a “table” format, with the keyword “Device System Information,” and the data update time is normal.
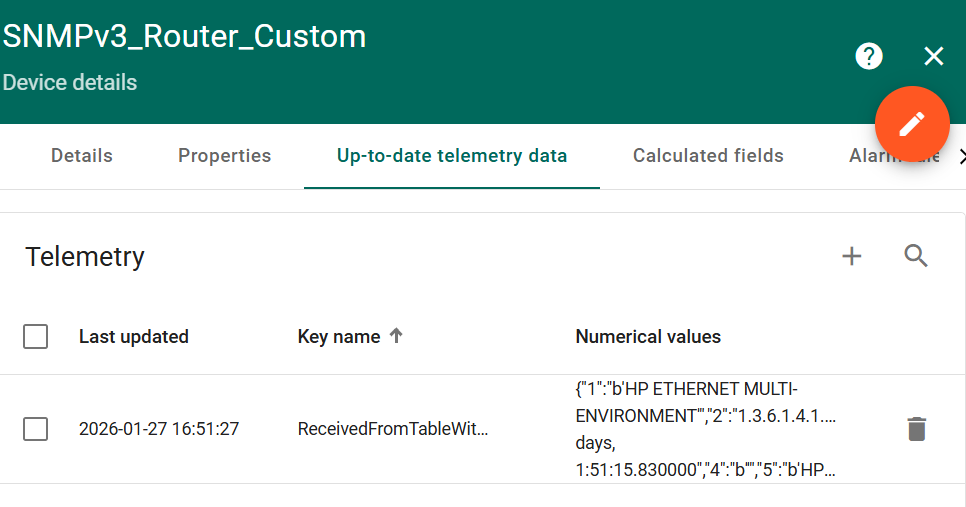
SNMPv3_Router_Custom device:
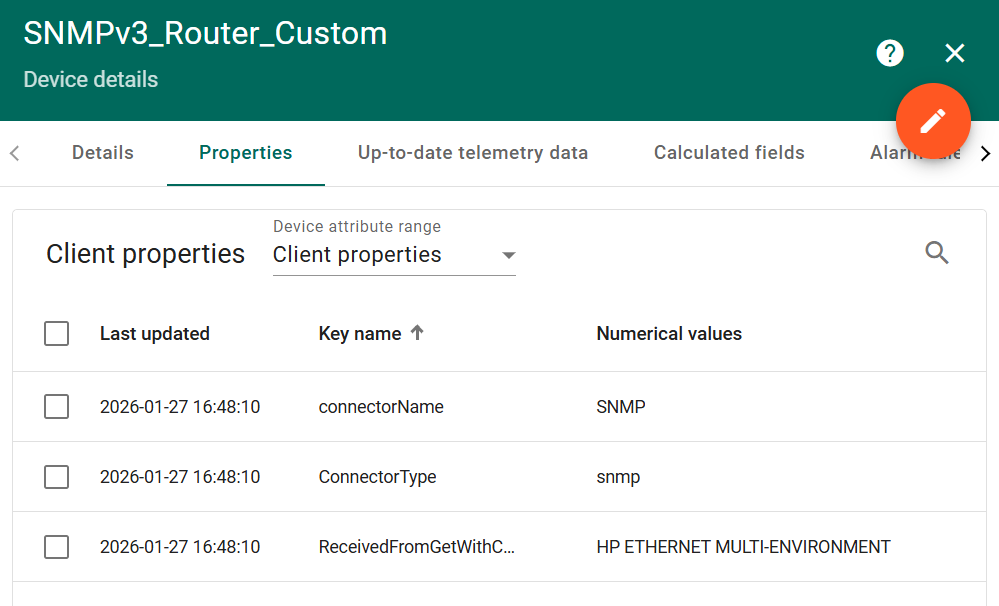
Successfully collected the table data corresponding to the keyword, including information such as the device’s network interfaces, with the data update time consistent with the collection interval.